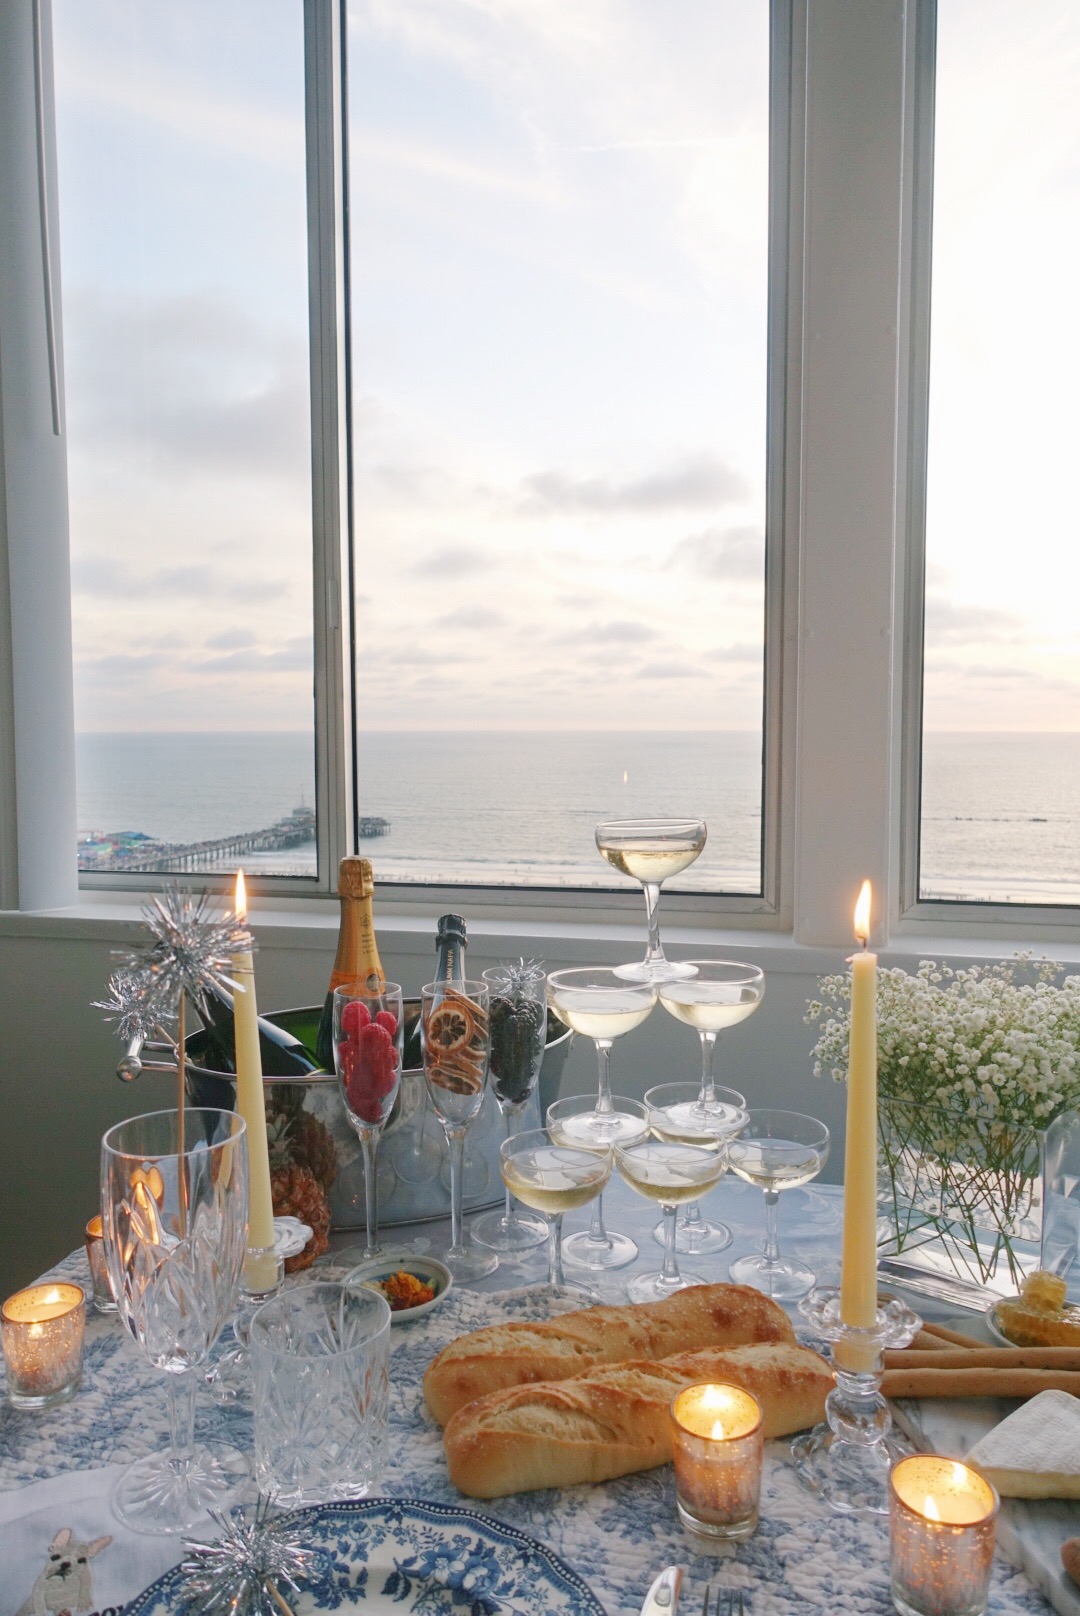
THE SETUP: Most likely you will be hosting at nighttime, especially since it gets dark so early this time of year. But for this shoot I wanted to have a nice view of the ocean, so I started setting up about an hour prior to the scheduled sunset time. One thing I wanted to incorporate that I just completely forgot about was balloons! I had thrown my friend an engagement party the week before and we had a bunch of beautiful balloons I will certainly be getting again for the actual holiday. My idea was to have them tied above the table on the back of each chair. Even without the balloons, however, it turned out even better than expected. I started with this beautiful blue damask tablecloth that complimented silver accents just as well as it went along with my mismatched set of blue and white plates. Then I put another layer down with my toile table runner for some contrast and dimension. Is there anything more romantic than a tapered candlelight?! So I started with about 6 small silver votive candles and then added three tapered ones in these beautiful short crystal holders. Without the balloons my plan was to not go too far out with the New Years decorations so I just stuck with these large tinsel drink stirrers, which I was surprised to find out were so large but you could easily cut them to fit any glass. I also added them in the silver ice bucket I used for champagne and on each plate for a little extra decoration. To present the food I really wanted to use this silver three tiered serving tray I found at Home Goods recently by Nicole Miller but I couldn’t find it anywhere online so I linked a few similar ones (1, 2, 3). They are usually made for desserts but it made our main course look extra special! I would make sure you can easily remove a layer in case you don’t have 20 guests to consume three levels of desserts every time! I also finally used these adorable cocktail napkins my sister sent Arthur and I with a special personalized embroidery on them. How cute is this Frenchie and check out all their other designs, I want every single one!
THE FOOD/DRINK: The obvious show stopper is my mini champagne tower! The key to a tower is to use all the same size champagne saucers. The math of arranging them works like this: if you start with a row of 10 x 10, then the next layer will be 9 x 9, 8 x 8, etc. Mine was just for decoration so I did not pour from the top like you would with a real tower, so that the champagne trickles down into each glass. Instead I stacked five at the bottom, then two, and then one. But if you are going to actually do this yourself, please stick to the appropriate math to ensure no glasses get hurt! In addition to the tower I also laid out some raspberries, dried blood orange slices, blackberries and edible flowers to compliment the champagne. Other good ideas would be sugar cubes, rosemary or lavender depending on what you can find and what looks the best! I put them in champagne flutes but I think champagne saucers are more practical for people to grab and looked prettier in my opinion. For appetizers I of course made a cheese plate because I just can’t entertain without one. I had a robiola bosina (creamy like brie), smoked cheddar and a humboldt fog. Of course I had my signature raw honeycomb addition as always, toffee peanuts, black olive breadsticks, these delicious chocolate and cocoa powdered almonds and a delicious salami all on my marble board, with these marble cheese utensils. The best part, however, was the delicious take and break bread we found at our grocery store from La Brea Bakery. I highly recommend getting any bread like this so it’s warm and fresh when you bake it quickly at home. You can find them alongside the fresh bread section at most stores. For the main dish my fiancé grilled lobster tails, asparagus, fillet mignon and salmon for me with a yummy black olive tapenade. He also made the most delicious truffle gnocchi that could easily give Mastro’s some steady competition. It was absolutely delicious. For dessert we made chocolate truffles but they weren’t ready in time to shoot unfortunately. I will have to do another post later on making them because it’s really not that difficult, as evidenced by the fact I have made them on my own! Enjoy!
-MGN
Shop the post:


